Everything you need to set up before building your first app
Date
2/28/2026

Introduction
We're living in a moment where anyone with an idea can build it — designers, product thinkers, or people who've never written a single line of code. AI has quietly removed the biggest barrier to making software: you no longer need to know how to code to build something real.
But before the fun begins, there's one unsexy step that trips almost everyone up: setting up your environment. It's not complicated, but if you skip steps or install things out of order, nothing works — and most tutorials don't explain why each piece matters.
This guide is here to fix that. By the end, you'll have everything you need to start Vibe Coding — and you'll actually understand what you installed and why.
1. What's the Big Picture?
Vibe Coding means telling AI what you want in plain English — and letting it write the code for you. No programming knowledge required.
The whole process is just one loop:
You describe what you want → Claude Code writes the code → Preview it on your phone → Not happy? Describe more → Happy? Save it to GitHub
2. What Tools Do You Need — and Why?
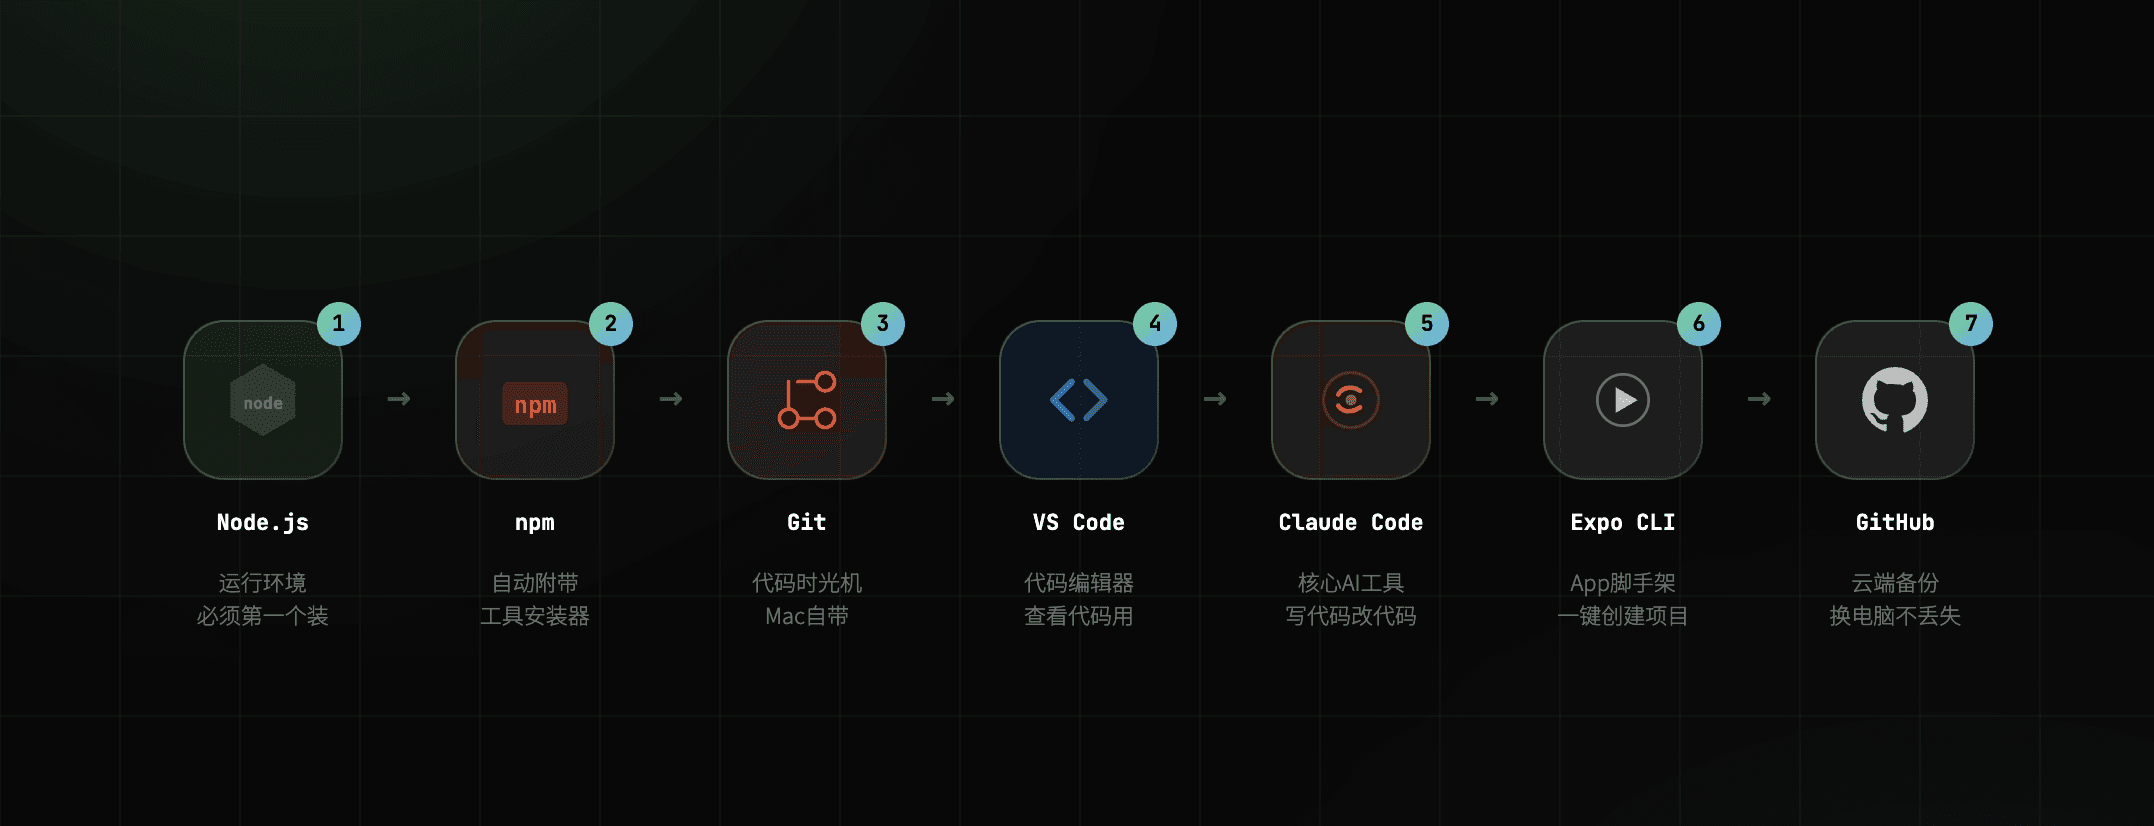
1. Node.js — The engine that powers everything. All developer tools depend on it, so this goes first. Nothing works without it. → https://nodejs.org
2. npm — No need to install separately; it comes bundled with Node.js. Think of it as an app store for developer tools.
3. Git — A time machine for your code. It tracks every change you make, so you can always roll back if something breaks. Already built into Mac — no installation needed.
4. VS Code — Your code editor. Use it to read and review the code Claude writes for you. It's free, and it has a built-in terminal so you never need to open a separate Terminal app. → https://code.visualstudio.com
5. Claude Code — The heart of the whole operation. You type what you want in plain English inside the terminal, and it writes, edits, and fixes your code. ⚠️ Note: Claude.ai (the chat interface) and the VS Code plugin are completely different things. For real Vibe Coding, you need Claude Code in the terminal. → Install via npm
6. Expo CLI — A scaffolding tool for mobile apps. It sets up your entire project structure with one command — the most beginner-friendly way to start building a mobile app. → Install via npm
7. Expo Go (mobile app) — Your live preview tool. Install it on your phone, scan a QR code, and instantly see your app as you build it. Every code change shows up in real time. → Search "Expo Go" on the App Store or Google Play
8. GitHub — Cloud backup for your code. Store everything online so you can pick up where you left off on any computer, and never lose your work. → https://github.com
3. Installation — Step by Step
Step 1: Install Node.js
Download and install from the official site. It's a standard installer — just keep clicking Next. → https://nodejs.org
Once installed, verify it in your terminal:
If you see a version number, you're good. ✅
While you're at it, verify npm too (it came along for the ride):
Version number = success. ✅
Step 2: Check if Git is Already There
Mac comes with Git pre-installed. Just run:
See a version number? You're all set — no installation needed. ✅
Step 3: Install VS Code
Download from the official site. Choose the .dmg file that matches your Mac's chip — Intel or Apple Silicon.
Not sure which chip you have? Run this in the terminal:
x86_64→ Intel chiparm64→ Apple Silicon
After downloading, drag it into your Applications folder. Done. No account needed. → https://code.visualstudio.com
How to use VS Code's built-in terminal: Go to the top menu → Terminal → New Terminal A terminal window appears at the bottom — it works exactly like the standalone Terminal app. I recommend doing everything from here; it keeps your workflow in one place.
Step 4: Install Claude Code
In your terminal, run:
You'll be asked for your computer's login password. Type it and press Enter. (The screen won't show any characters as you type — that's normal.)
Verify:
Version number = success. ✅
Step 5: Install Expo CLI
Enter your password and wait for it to finish.
Verify:
Version number = success. ✅
Step 6: Install Expo Go on Your Phone
Search "Expo Go" on the App Store or Google Play and download it. No sign-up required.
⚠️ Important: Your phone and computer must be on the same Wi-Fi network, or the preview won't connect.
Step 7: Set Up GitHub and Link It to Your Computer
1. Create a free account → https://github.com
2. Set your account info in the terminal
Verify it worked:
See your name and email in the list? ✅
3. Create a new repository → https://github.com/new
Repository name: your project name
Set to Private
Click Create repository
4. Get a Personal Access Token (this acts as your password) → https://github.com/settings/tokens → Generate new token (classic) → Check the repo box → Generate token → Copy it and save it somewhere safe
⚠️ This token only appears once. It's not your login password — it's a separate key used specifically when pushing code from your terminal.
5. Create your project and upload it
When prompted, enter your GitHub username. For the password, paste your Personal Access Token.
4. Now That Everything's Set Up — How Do You Actually Start Vibe Coding?
Recommended workflow: do everything inside VS Code
5. Important: Don't Close the Terminal ⚠️
Situation | Can you close the terminal? |
|---|---|
Claude Code is running | ❌ Closing it stops Claude Code |
| ❌ Closing it disconnects your phone preview |
Taking a break, grabbing food | ✅ Yes |
Done for the day, shutting down | ✅ Yes |
When you come back: Just reopen VS Code, open a new terminal, and run your commands again. Nothing gets lost.
6. Save to GitHub When You're Done
Best practice: push after finishing each feature, not after finishing the entire app. Think of it like saving your progress in a video game.
Conclusion
If you've made it this far and everything is set up — honestly, the hardest part is already behind you.
Most people never start because the setup feels intimidating. But now you have a working environment, your code is backed up in the cloud, and you can preview changes live on your phone. That's a real development setup. The same one I used to build my first app.
Here's the thing about Vibe Coding: you don't need to understand every line of code Claude writes. Your job is to have a clear vision, describe it well, and know when something doesn't feel right. That's exactly what designers are already trained to do.
The shift isn't from designer to developer — it's from designer to director.
In the next article, I'll walk through the actual Vibe Coding process from scratch: how I prompted Claude Code to build a real app, what the back-and-forth actually looks like, and a honest guide to the mistakes I made along the way — so you don't have to make them too.
If you're building something, I'd love to see it. Feel free to reach out.